If you run a WordPress website on a LiteSpeed server, you’re already ahead of the curve. LiteSpeed hosting is known for speed and efficiency, but most website owners don’t realize they can squeeze even more performance out of it without paying for premium plugins like WP Rocket or FlyingPress.
In this detailed guide, I’ll walk you step-by-step through LiteSpeed Cache plugin’s best settings—settings that are tested, reliable, and completely free. You’ll learn not only how to configure it but also why each setting matters, so you can avoid breaking your site while making it lightning-fast.
Table of Contents
Why One Speed Plugin Doesn’t Work for Everyone
When people watch videos about speed-boosting plugins, the reactions are usually split:
- Some rave about the results: “My website is blazing fast now!”
- Others panic: “My site stopped loading after I installed it!”
The truth? Both groups are correct.
Every website is different—server architecture, PHP version, WordPress version, theme, and installed plugins vary widely. That’s why a plugin or trick that speeds up one site might crash another.
The key is to optimize settings based on your hosting environment. This is why today’s guide focuses only on sites hosted on LiteSpeed servers—so the recommendations you follow here will be directly relevant if that’s your setup.
The Power of LiteSpeed Cache Plugin
If your hosting uses LiteSpeed servers, you don’t need premium cache plugins. The LiteSpeed Cache plugin is specifically built for this environment and can rival (or outperform) paid tools—when configured correctly.
The best part? It’s completely free. You just need to install it, apply the right settings, and you’re good to go.
Step 1 – Installing LiteSpeed Cache
- Confirm your hosting uses LiteSpeed
Before you even install the plugin, make sure your hosting provider uses LiteSpeed servers. This is crucial because the plugin’s advanced features are designed specifically for this server type. - Install the plugin
- Go to your WordPress dashboard → Plugins → Add New.
- Search for LiteSpeed Cache (remember, it’s pronounced cash, not cash-ay).
- Click Install Now and then Activate.
- Access the plugin dashboard
You’ll now see “LiteSpeed Cache” in your WordPress sidebar. If not, refresh your page—it should appear.
Step 2 – Understanding the Plugin Dashboard
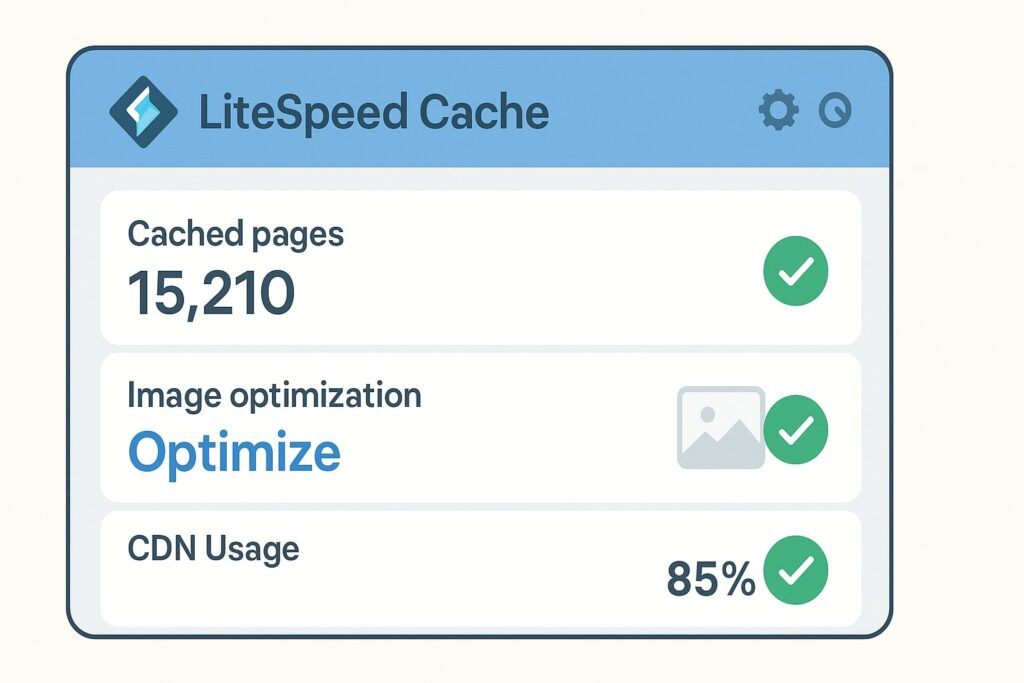
The dashboard gives you a quick overview:
- How many images have been optimized
- Number of cached pages
- CDN usage
- Placeholder images for low-quality previews
- Page load metrics
It’s essentially a performance snapshot so you don’t need to constantly check external tools like Google PageSpeed Insights.
Step 3 – Choosing the Right Preset
LiteSpeed Cache offers Presets for quick setup:
- Essential
- Basic
- Advanced (recommended)
- Aggressive
- Extreme
For most websites, Advanced is the sweet spot—it applies a balanced set of optimizations without risking site breakage. Aggressive or Extreme can be faster but may cause layout issues or functionality loss.
Step 4 – Configuring General Settings
Turn Off Automatic Upgrade
Automatic plugin updates can reset or conflict with your custom settings. Keep this off and update manually when needed.
Domain Key
The domain key is a unique code that unlocks certain LiteSpeed features. Click Request Domain Key and wait for it to appear.
Enable Guest Mode & Guest Optimization
Normally, cache benefits kick in only from a user’s second visit. Guest Mode builds a “pre-cooked” page so even first-time visitors experience speed instantly.
Add Server IP Address
You can find this in your hosting control panel (cPanel, Namecheap, etc.). Copy the Shared IP Address and paste it into the Server IP field.
Save your changes before moving on.
Step 5 – Cache Settings
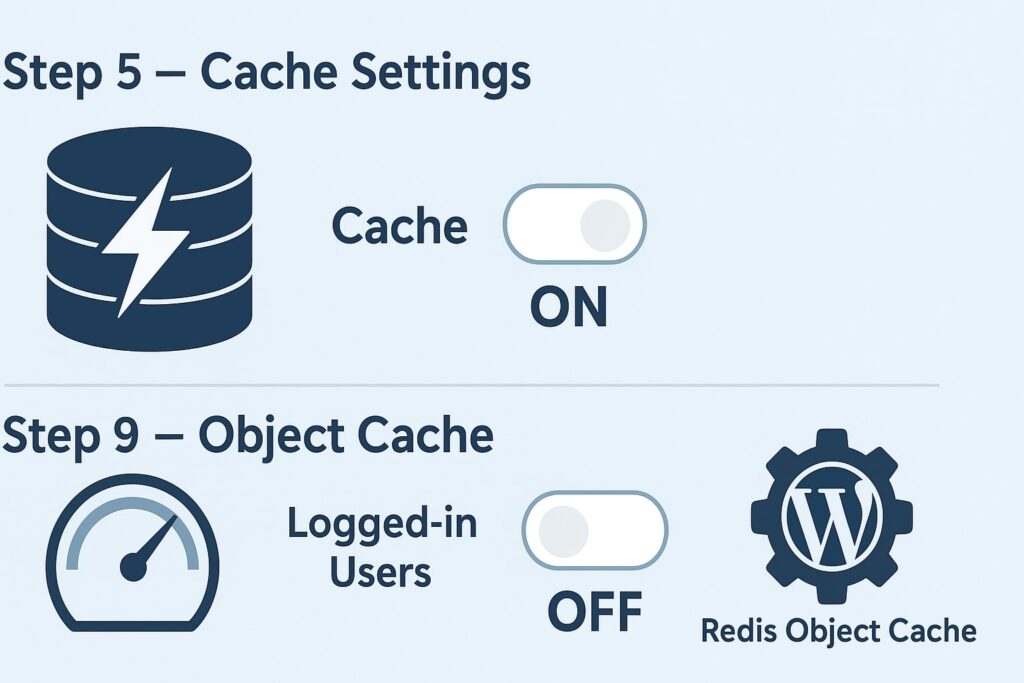
Enable Cache – ON
Cache Logged-in Users – OFF
Cache Comments – OFF
Cache REST API – ON
Cache Login Page – ON
Cache PHP Resources – ON
Cache Mobile – ON
Why these settings? Logged-in users (like admins) should always see real-time changes, not cached pages. Comments also change dynamically, so caching them can cause confusion.
Step 6 – TTL (Time to Live) Settings
TTL controls how long cached content stays before it’s refreshed. Default values are fine for most setups—no need to change them unless you have special content-refresh requirements.
Step 7 – Purge Settings
- Purge All on Upgrade – ON
- Serve Stale – OFF (only turn on during server downtime)
- Scheduled Purge URLs – use if you have pages that change regularly, like event listings or scoreboards.
Step 8 – Exclude Settings
Most users can skip this. Only use exclusions if you have certain pages that should never be cached, such as checkout or dynamic search pages.
Step 9 – Object Cache
Object Cache stores database query results for faster page loads.
- Recommended Method: Redis (if your host supports it)
- Enable Persistent Connection – ON
- Cache WP Admin – ON
- Store Transients – OFF
Check with your hosting support to enable Redis and get the Host/Port details.
Step 10 – Browser Cache
Enable browser caching so repeat visitors load your site even faster. Keep the default TTL value.
Step 11 – Advanced Settings
- Improve HTTP/HTTPS Compatibility – ON
- Instant Click – OFF (saves server resources by not preloading links unnecessarily).
Step 12 – Image Optimization
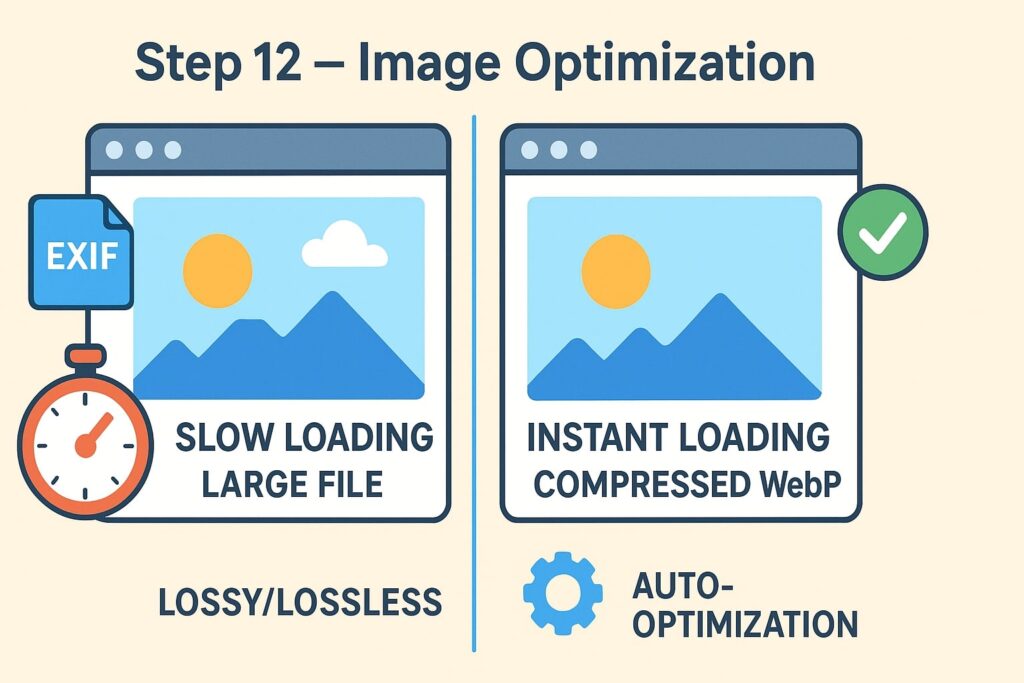
Images often make up the bulk of a page’s weight. In LiteSpeed Cache:
- Auto Request Cron – ON
- Auto Pull Cron – ON
- Optimize Original Images – ON
- Remove Original Backups – OFF (keep originals for safety)
- Lossy + Lossless Optimization – ON
- Preserve EXIF Data – OFF (unless you need camera data)
- Image WebP Replacement – ON
- WebP for Extra SRC Set – ON
Practical Tips for Best Results
- Test after every major change – Don’t enable every setting at once. Apply gradually and check your site.
- Backup first – Even the best settings can conflict with certain themes or plugins.
- Combine with good hosting – LiteSpeed Cache shines when paired with SSD storage, HTTP/3 support, and updated PHP versions.
- Monitor performance – Use tools like GTmetrix or PageSpeed Insights to track improvements.
Common Mistakes to Avoid
- Enabling extreme presets without testing—can break CSS or scripts.
- Caching admin pages—causes outdated content during site edits.
- Forgetting to purge cache after making design or layout changes.
Conclusion
LiteSpeed Cache is a powerful, free optimization tool—but only when set up correctly. With the above configuration, you’ll have a fast, stable site without paying for extra speed plugins.
The best part? Once you apply these settings, you can focus less on tweaking performance and more on growing your content or business.
FAQs
1. Do I need LiteSpeed hosting to use LiteSpeed Cache?
Yes, to access its full power. Some features work on other servers, but LiteSpeed hosting unlocks the best performance gains.
2. Is LiteSpeed Cache better than WP Rocket?
On LiteSpeed servers, yes. It’s free, server-level integrated, and often faster than WP Rocket when configured correctly.
3. How often should I purge my cache?
Only when making site changes or updates. Constant purging defeats the purpose of caching.
4. Can LiteSpeed Cache break my site?
It can if you enable overly aggressive settings. Always test after changes.
5. Does LiteSpeed Cache replace a CDN?
No, but it integrates well with CDNs like QUIC.cloud for even faster global delivery.
6. Will it work on WooCommerce sites?
Yes, with proper exclusions for cart, checkout, and account pages.
7. Should I enable Redis if my host offers it?
Yes—Redis Object Cache can significantly speed up database-driven sites.